
Feature story
Essential Guide to Sculpting Figures with Polymer Clay
For beginners looking to dive into the world of character sculpting, understanding the fundamental materials and techniques is the first step toward success. While the variety of professional tools can seem overwhelming, the most important part of the journey is simply to begin. This guide provides a foundational overview of the essential elements needed to create your first polymer clay masterpiece.
Dorothy May Langford
Writer
Lounge note
Settle in — the full story and key updates are below.
Desk
Entertainment

For beginners looking to dive into the world of character sculpting, understanding the fundamental materials and techniques is the first step toward success. While the variety of professional tools can seem overwhelming, the most important part of the journey is simply to begin. This guide provides a foundational overview of the essential elements needed to create your first polymer clay masterpiece.
Understanding Your Medium: Why Polymer Clay?
When starting out, many ask why professionals favor polymer clay or non-curing clays over cheaper, air-drying alternatives. The primary factor is time. Large-scale or detailed projects can take days, weeks, or even longer to finalize. Air-drying clay presents a significant challenge because it begins to harden immediately upon exposure to air. Attempting to keep it workable with moist cloths often leads to issues with mold, structural collapse, or uneven drying.
Polymer clay, however, remains soft until it is baked in a dedicated oven, allowing you to work at your own pace without the pressure of a ticking clock. For those just starting, firm varieties such as Super Sculpey Firm or Sculpey Premo are highly recommended. These clays are durable enough to hold fine details without being easily flattened by an accidental touch, yet they remain pliable enough to knead by hand. They typically cure at approximately 130°C and have "low memory," making it easy to blend seams and smooth out surfaces.
Building a Strong Foundation: Armatures and Padding
To prevent your sculpture from sagging or breaking during the creative process, you must build it around a "skeleton" known as an armature. This internal support is usually made from wire and allows you to pose your character before adding any clay. Steel wire with a diameter of roughly 1 mm is ideal; it provides sturdy support while remaining bendable by hand. For maximum stability and to give the clay a better surface to grip, it is best to twist two strands of wire together using pliers or a drill.
For larger, more voluminous sections of the figure, use ordinary kitchen aluminum foil as padding around the wire. This serves three vital purposes: it significantly reduces the amount of expensive clay required, makes the finished piece lighter, and helps the sculpture bake evenly. Because metal conducts heat, the foil warms the clay from the inside out during the curing process, ensuring the core is thoroughly baked.
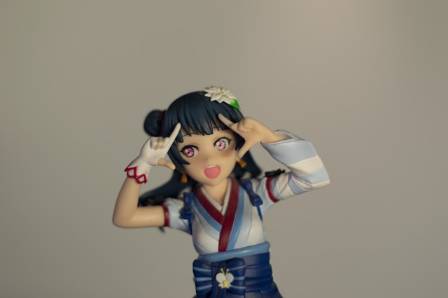
Essential Sculpting and Smoothing Tools
You do not need an expensive kit to begin sculpting. In fact, common household items like toothpicks, the backs of spoons, chopsticks, or even rolling pins make excellent shaping tools. As you progress, you might invest in a set of wax-carvers or silicone tipped brushes. Silicone brushes are particularly useful for blending, while the ballpoint tools often found on the opposite end are perfect for creating eye sockets or other indentations.
Achieving a professional finish often requires smoothing out fingerprints and small imperfections. High-percentage alcohol (90% or higher) acts on polymer clay much like water does on ceramic clay—it slightly dissolves the surface to help erase scratches. You can apply it delicately with a soft brush or a cotton swab. Once the piece is baked, you can use fine-grit sanding sponges to further refine the surface, and a small amount of acetone can be used on cured clay to remove stubborn lint or oils.
Workspace Setup and Final Flourishes
A dedicated base is helpful for holding your armature steady while you work. A simple wooden block with pre-drilled holes allows you to set the sculpture down safely when you need to step away. Once the sculpting is finished and baked, the work-in-progress base is usually replaced with a decorative one that complements the theme of the figure.
The final stage is adding color. Most polymer clays are slightly porous, meaning they take acrylic paint very well even without a primer. Miniature-specific acrylic paints are particularly effective for capturing fine details. If you wish to protect your work or change the finish, you can apply a matte or glossy varnish. Some artists even use a layer of varnish as a base for shading with pastel chalks to add depth and realism to their characters.
More to explore

· en
Your Guide to the Perfect Cold Espresso
Nathaniel Stone

· en
5 Pespectives for Understanding the Dynamics of Social Media in Public Opinion Formation
Dominic

· en
3 ways make Birthday a Shared Experience
Arthur Miles

· en
The Salty Single Blade of Coastal Canoeing
Aria Whitmore
· en
Cute Rabbits to Draw
Taylor Reed

· en
Key Points to Keep in Mind When Cleaning Your Bathroom
Acacia