Feature story
Viral Mango Mousse Cake
These ultra-realistic mango mousse cakes have taken over social media, and for good reason.
Henry Clark
Writer
Lounge note
Settle in — the full story and key updates are below.
Desk
Entertainment
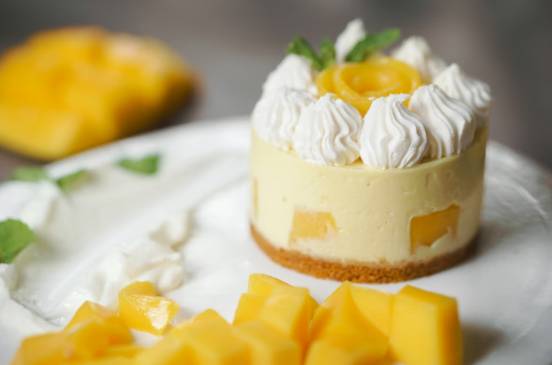
These ultra-realistic mango mousse cakes have taken over social media, and for good reason. With a glossy mango-shaped shell, creamy mousse interior, and fruity mango confit center, they look like real fruit while tasting like a luxurious French pastry.
Although the process may seem complicated, each individual step is actually quite manageable. The techniques used here are common in modern pastry kitchens — mousse making, fruit inserts, glazing, and molded desserts — but recreating them at home definitely takes patience and freezer space.
What Makes These Cakes Special?
The dessert combines several textures and layers:
-
Smooth mango mousse
-
Bright mango confit center
-
Crisp biscuit base
-
Thin white chocolate shell
The final result is elegant, fruity, creamy, and visually stunning.
Ingredients
Mango Puree
You’ll need:
-
2–3 ripe mangoes
Champagne or Alphonso mangoes work especially well because they are sweet, fragrant, and smooth.
Mango Confit
-
200 g mango puree
-
15 g lemon juice
-
35 g sugar
-
4 g pectin NH
Pectin helps the insert hold its shape. Gelatin can be substituted if needed.
Mango Mousse
-
360 g heavy whipping cream
-
360 g mango puree
-
60 g granulated sugar
-
10 g powdered gelatin
Biscuit Base
-
200 g all-purpose flour
-
115 g butter
-
80 g powdered sugar
-
16 g almond flour
-
40 g whole egg
-
¼ teaspoon salt
White Chocolate Coating
-
300 g white chocolate
-
75 g cocoa butter
-
Yellow and orange oil-based food coloring
Step 1: Make the Mango Puree
Peel and chop the mangoes, avoiding the pit.
Blend until completely smooth, then strain to remove fibers or chunks.
Step 2: Prepare the Mango Confit Inserts
Mix the sugar and pectin together first to prevent clumping.
Heat the mango puree and lemon juice in a saucepan until warm.
Slowly whisk in the sugar mixture and bring everything to a boil. Cook briefly until slightly thickened.
Pour the mixture into small half-sphere silicone molds and freeze until solid.
Recommended freeze time:
\geq 3\text{ hours}
Step 3: Make the Mango Mousse
Bloom the Gelatin
Mix powdered gelatin with cold water and let it sit for several minutes.
Heat the Mango Base
Warm half of the mango puree with sugar, making sure it does not boil.
Remove from the heat and stir in the bloomed gelatin until dissolved.
Add the remaining cold mango puree to cool the mixture.
Whip the Cream
Whip the heavy cream to soft peaks.
Fold the mango mixture into the whipped cream gently in several additions.
Use immediately before the mousse begins setting.
Step 4: Assemble the Molds
Fill mango-shaped silicone molds halfway with mousse.
Place a frozen mango confit insert into the center.
Cover with additional mousse and smooth the tops.
Freeze completely, preferably overnight.
Step 5: Bake the Biscuit Bases
Cream the butter and powdered sugar together until light.
Mix in the egg, almond flour, and salt.
Add the flour and mix until a dough forms.
Chill the dough for:
30\text{ minutes}
Roll out the dough and cut shapes that fit the bottom of your mango molds.
Bake at:
350^\circ\mathrm{F};(175^\circ\mathrm{C})
for about:
10\text{–}12\text{ minutes}
Allow them to cool completely.
Step 6: Prepare the Chocolate Coating
Melt the white chocolate and cocoa butter until smooth.
Cool the glaze to approximately:
90\text{–}95^\circ\mathrm{F};(32\text{–}35^\circ\mathrm{C})
This temperature keeps the mousse from melting while ensuring a thin, smooth coating.
Tint the glaze with yellow food coloring, then add touches of orange for a more realistic mango appearance.
Step 7: Glaze and Finish
Remove the frozen mousse cakes from the molds.
Dip each cake into the glaze until fully coated.
Optional finishing techniques include:
-
Airbrushing color gradients
-
Adding texture with a brush
-
Creating natural mango shading
Place each finished mousse cake onto a biscuit base.
Allow the cakes to thaw in the refrigerator for:
1\text{–}2\text{ hours}
before serving.
Final Thoughts
These mango mousse cakes may require several steps, but the final result is incredibly impressive. The combination of creamy mousse, bright fruit filling, crisp biscuit, and glossy shell creates a dessert that looks straight out of a luxury pastry shop.
Perfect for special occasions, dinner parties, or simply challenging your pastry skills at home.
More to explore

· en
The Real Reason Roosters Make So Much Noise Every Single Morning
Foster Julian

· en
Fascinating Realities of a Day in the Life of a Historic Lighthouse Keeper
Lucy Marshall
· en
The Grand Foundation and Early Origins of the Royal Ontario Museum
Florence Merriweather

· en
Arches National Park: A Guide to Utah’s Natural Stone Wonders
Olivia Barnes

· en
The mystery of Easter Island revealed?
Serena Langford

· en
Exploring Solar Sail: Next-Gen Propulsion for Interstellar Travel
Nathan Cole