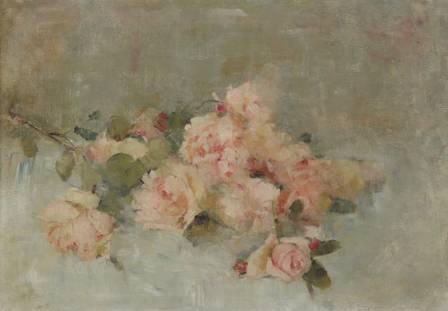
Painting flowers is a beloved pastime for artists of all skill levels, but it’s often perceived as intimidating—with their delicate petals, subtle color gradients, and intricate details, capturing their natural beauty can feel like a daunting task. Whether you’re a beginner picking up a brush for the first time or a seasoned painter looking to simplify your process, the good news is that stunning floral art doesn’t require years of training or fancy tools. In fact, some of the most charming flower paintings come from using unexpected materials and straightforward techniques that prioritize creativity over precision. Below, we’ll explore four easy-to-master methods that will help you create vibrant, lifelike flowers in no time—no complicated brushwork or advanced skills required. These techniques celebrate experimentation, embrace imperfection, and prove that anyone can paint beautiful blooms with a little patience and a willingness to play.
The One-Stroke Technique: Blend Color & Shape in a Single Motion
The one-stroke technique is a game-changer for painting realistic flowers, as it allows you to create seamless color gradients and natural-looking petals in just one brush movement—eliminating the need for tedious layering or blending. To get started, you’ll need a flat brush (size 8–12 works best for most flowers), two complementary shades of paint (e.g., deep pink and pale pink for roses, golden yellow and cream for daisies), and a canvas or paper primed for your medium (acrylics or oils work beautifully here). Begin by wetting your brush slightly—this helps the paint flow smoothly and mix naturally on the canvas without drying out too quickly. Next, load the brush strategically: apply the darker shade to one half of the bristles and the lighter shade to the other, ensuring there’s a soft transition between the two colors (you can swirl the brush gently on the palette to blend the edges slightly, but avoid overmixing). Before painting, sketch a small circle or dot in the center of your flower with a pencil—this will serve as your guide for placing petals. To create a single petal, hold the brush vertically against the canvas, with the darker color facing the center of the flower. Press the brush down lightly and pull upward to the desired length, then release pressure slightly as you curve the tip of the brush outward to form the petal’s edge. Bring the brush back down to the center to complete the shape, and you’ll notice a beautiful gradient from dark to light, mimicking the way light hits real petals. For fuller flowers, try painting heart-shaped petals by moving the brush in a gentle loop—this creates two petals at once, saving time and adding fullness. Continue working in a circular pattern around the center, overlapping petals slightly to create depth, and vary the pressure of your brush to make some petals thicker and others more delicate. Once all petals are complete, fill in the center with a contrasting color (e.g., brown for sunflowers, yellow for roses) using a small round brush, and add a few tiny dots or lines to mimic pollen or texture. With a little practice, this technique works for almost any flower—from roses and peonies to lilies and tulips—and the results are always soft, natural, and full of dimension.
Q-Tip Painting: Create Delicate Blooms with Household Tools
You don’t need expensive brushes to paint beautiful flowers—everyday items like Q-Tips (or cotton swabs) are perfect for creating small, delicate blooms like cherry blossoms, lavender, or baby’s breath. This technique is ideal for beginners because it’s forgiving, fast, and produces a charming, textured effect that’s hard to achieve with traditional brushes. To begin, gather your supplies: a bundle of 5–6 Q-Tips tied together with an elastic band (spreading the ends slightly so they form a loose cluster), acrylic or watercolor paint (light, soft shades work best for delicate flowers), a canvas or watercolor paper, and a pencil for sketching. Start by studying the flower you want to paint—note the shape of the blooms, how they cluster together, and any color variations (e.g., cherry blossoms have pale pink petals with darker pink centers). Sketch a rough outline of your composition on the canvas—this could be a branch of cherry blossoms, a patch of lavender, or a bouquet of baby’s breath. Next, dip the bundled Q-Tips into your paint, ensuring each swab is evenly coated (but not dripping). Hold the bundle vertically and press it firmly against the canvas—this creates a cluster of small, rounded petals that look like tiny flowers. For cherry blossoms, press the Q-Tips lightly on tree branches (painted beforehand with a thin brush and brown paint) to create clusters of blooms. For lavender, use a lighter touch and drag the Q-Tips slightly as you press, creating longer, more slender petals. To add depth and realism, layer different shades of the same color: start with a darker shade for the base of the flowers, then add lighter shades on top to mimic highlights. You can also dip the tips of the Q-Tips in white paint and press gently to add subtle highlights on the petals. The best part about this technique is its versatility—you can use it to paint entire gardens, add details to larger flower paintings, or even create background foliage by dipping the Q-Tips in green paint and pressing them in clusters. It’s a fun, low-pressure way to experiment with color and texture, and the results are always whimsical and charming.
Soda Bottle Stamping: Craft Cherry Blossoms with Recycled Materials
Before you recycle your next plastic soda bottle, save the bottom—this unlikely tool makes perfect cherry blossoms, apple blossoms, or any four-petaled flower with minimal effort. This technique is not only eco-friendly but also incredibly fast, allowing you to cover an entire tree branch in blooms in minutes. Here’s how to do it: First, gather your supplies: a clean plastic soda bottle (a 2-liter bottle works best for larger flowers, while a 500ml bottle is great for smaller blooms), scissors, acrylic paint (pale pink, white, and a touch of dark pink for details), a canvas, a thin brush for painting branches, and a paper towel for cleaning the bottle. Start by cutting off the bottom of the soda bottle—use scissors to make a clean cut just above the ridged part (the nubs on the bottom of the bottle will create the petals). Rinse the bottle thoroughly to remove any residue, then pat it dry. Next, paint your background: for a cherry blossom tree, use a pale blue or soft white to mimic the sky, or a light green for a springtime scene. Once the background is dry, use a thin brush and brown paint to create a tree trunk and branches—make the branches thin and slightly curved, as real cherry tree branches are delicate and gnarled. Now, it’s time to stamp the flowers: squeeze a small amount of pale pink paint onto your palette, and dip the bottom of the soda bottle into the paint, ensuring all the nubs (petals) are evenly coated. Press the bottle firmly against a branch on the canvas, then lift it straight up—you’ll be left with a perfect four-petaled flower. Repeat this process along the branches, varying the pressure to create some flowers that are darker (more paint) and some lighter (less paint), and overlapping a few blooms to add fullness. Once all the base flowers are stamped, let them dry for a few minutes, then use a small round brush to add details: dip the brush in dark pink paint and add a tiny dot in the center of each flower, or use white paint to add subtle highlights on the edges of the petals. For extra dimension, you can also stamp a few flowers with white paint and layer them on top of the pink ones. This technique is great for beginners because it requires no drawing skills—just a steady hand and a willingness to experiment—and the results are stunningly realistic. Plus, it’s a fun way to repurpose household items and reduce waste!
Stipple Brush Flower Clusters: Build Texture & Depth with Dabbing
If you struggle with painting small, detailed flowers or want to create full, lush clusters (like lavender fields, wildflower meadows, or bushy blooms), the stipple brush technique is perfect for you. A stipple brush (also known as a dry brush) has short, thick bristles that are flat at the bottom, making it ideal for dabbing paint onto the canvas to create texture and volume. This technique is fast, forgiving, and produces beautiful, natural-looking clusters that add depth to any painting. To get started, you’ll need a stipple brush (size 10–16), three shades of the same color (dark, medium, and light), a canvas, and optional green paint for leaves. Begin by choosing your color palette—for lavender, use deep purple, medium purple, and pale purple; for wildflowers, try red, pink, and white, or yellow, orange, and cream. Start with the darkest shade: dip the stipple brush into the paint, tap off any excess (you don’t want drips), and dab it randomly on the canvas in the area where you want your flower cluster. The key here is to vary the pressure and spacing—some dabs should be firm and close together, while others are lighter and more spread out—to mimic the way flowers grow in nature. Next, move on to the medium shade: dip the brush again, tap off excess, and dab it over the darkest clusters, overlapping slightly to blend the colors. This adds depth and makes the clusters look fuller. Finally, use the lightest shade (or white paint) to add highlights—dab it sparingly on the top of the clusters, as this is where light would naturally hit. For leaves, switch to a smaller stipple brush or a round brush, dip it in green paint, and dab small clusters around the flowers, or use short, quick strokes to create stems. This technique works beautifully for background elements (like a field of flowers in a landscape painting) or as the focal point of a piece (like a close-up of a lavender bush). It’s also a great way to cover large areas quickly, and the texture created by the stipple brush mimics the soft, fuzzy look of real flower clusters. Best of all, there’s no right or wrong way to do it—imperfections only add to the natural, organic feel of the painting.
Conclusion: Embrace Creativity & Experiment with Everyday Tools
Painting flowers doesn’t have to be complicated or intimidating—these four techniques prove that you can create stunning blooms using simple tools, household items, and a little creativity. Whether you’re using the one-stroke technique for lifelike roses, Q-Tips for delicate cherry blossoms, soda bottles for eco-friendly stamps, or a stipple brush for lush clusters, the key is to embrace experimentation and let go of the pressure to be perfect. Don’t be afraid to mix colors, vary your brush pressure, or try unexpected materials—some of the most beautiful flower paintings come from happy accidents and playful exploration. If you want to take it a step further, try repurposing other household items as painting tools: use the cut end of a bok choy to paint roses, a fork to create sunflower petals, or a sponge to add texture to flower centers. Remember, painting is about expressing yourself, not replicating nature exactly—so let your personality shine through in your color choices and composition. With a little practice, you’ll be painting beautiful, vibrant flowers that bring joy to both you and anyone who sees them. So grab your supplies, pick a technique, and let your creativity bloom—you might be surprised by how talented you are!