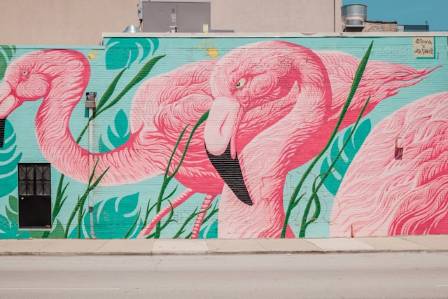
Feature story
Easy Flamingo Painting Tutorial
Painting a flamingo is a fun and satisfying project for artists of all skill levels. With its elegant shape, curved neck, and vibrant pink feathers, this tropical bird makes an eye-catching subject. By following a few simple steps, you can create a beautiful flamingo painting while learning useful painting techniques along the way.
Edmund Shaw
Writer
Lounge note
Settle in — the full story and key updates are below.
Desk
Entertainment
Painting a flamingo is a fun and satisfying project for artists of all skill levels. With its elegant shape, curved neck, and vibrant pink feathers, this tropical bird makes an eye-catching subject. By following a few simple steps, you can create a beautiful flamingo painting while learning useful painting techniques along the way.
Gather Your Supplies
Before starting, prepare all the materials you’ll need:
Canvas, watercolor paper, or acrylic paper
Acrylic paints or watercolors
A variety of brushes (large, medium, and detail brushes)
Mixing palette
Water container
Paper towels or cloth
Reference photo of a flamingo
Easel (optional)
Having everything organized before you begin helps keep the painting process smooth and enjoyable.
Choosing Materials
If you're new to painting, student-grade paints are a budget-friendly option and work well for practice. Acrylic paints are especially beginner-friendly because they dry quickly and allow easy layering.
For brushes, synthetic bristles are durable and suitable for acrylics. A mix of flat, round, and fine-detail brushes will give you flexibility when painting large areas and small details.
Set Up Your Workspace
Arrange your paints, brushes, water, and reference image within easy reach. Position your canvas comfortably and, if possible, keep your reference image at eye level. A tidy workspace helps you stay focused and creative.
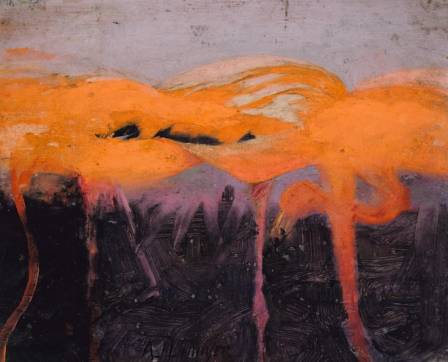
Step 1: Sketch the Flamingo
Begin with a light pencil sketch.
Focus on:
The curved neck
Oval-shaped body
Long, thin legs
Distinctive hooked beak
Use simple shapes to establish proportions before refining the outline. Keep pencil marks faint so they won't show through the paint later.
Pay Attention to Proportions
A flamingo’s neck is usually much longer than its body, and its legs extend well below the torso. Take your time during this stage, as a strong sketch provides the foundation for a successful painting.
Step 2: Apply the Base Colors
Once your sketch is ready, start blocking in the main colors.
Body
Cover the body with soft pink tones. Blend lighter and darker shades to create gentle variation and volume.
Feathers
Add white or pale pink highlights to areas where feathers catch the light. Work in thin layers for smoother transitions.
Beak and Legs
Use black, gray, coral, or orange tones depending on your reference image. These contrasting colors help define the flamingo’s unique appearance.
Build Color Gradually
Rather than applying thick paint immediately, work in multiple thin layers. This creates richer color and smoother blending.
Step 3: Add Feather Texture and Details
Once the base layers have dried, begin refining the bird.
Feathers
Use smaller brushes to paint feather patterns and texture. Follow the natural direction of feather growth, adding subtle highlights and shadows.
Eye
Paint the eye carefully using dark tones, then add a tiny white highlight to create a realistic sparkle and bring the bird to life.
Beak
Define the beak’s shape with darker shading and highlights. Pay attention to the color transitions and curved structure.
Step 4: Create Depth with Shading
Shadows help transform a flat painting into a realistic image.
Focus on:
Under the neck
Beneath the wings
Around the body contours
Areas where feathers overlap
Mix deeper pinks, purples, or soft grays into shadowed areas. Blend carefully to maintain smooth transitions.
Add Dimension
Observe how light falls across your reference photo and use that information to place highlights and shadows naturally.
Step 5: Paint the Background
A simple background helps the flamingo stand out.
Popular options include:
Soft blue water
Tropical scenery
Abstract washes of color
Reflections on a lagoon
Keep the background less detailed than the bird itself so the flamingo remains the focal point.
Adding Reflections
If your flamingo is standing in water, paint a soft reflection beneath it using lighter, less detailed brushstrokes. Reflections add realism and depth to the composition.
Step 6: Final Refinements
Before finishing, review the painting and make any necessary adjustments.
Check:
Edge clarity
Feather highlights
Color balance
Contrast levels
Small details around the eyes and beak
These final touches can greatly improve the overall appearance of the artwork.
Protecting Your Finished Painting
Once completely dry, consider applying a protective varnish.
Benefits include:
Preserving colors
Protecting against dust and moisture
Providing a consistent surface finish
Choose matte, satin, or gloss varnish depending on the look you prefer.
Tips for Success
Work from large shapes to small details.
Use reference photos for accurate proportions.
Build colors gradually through layers.
Allow paint to dry between stages.
Practice brush control with simple studies before tackling larger paintings.
Final Thoughts
Painting a flamingo is an excellent way to practice color blending, shading, and texture while creating a vibrant piece of artwork. Start with a simple sketch, build your colors slowly, add realistic details, and finish with thoughtful highlights and shadows. With patience and practice, you'll be able to capture the elegance and beauty of this iconic pink bird and create a painting you'll be proud to display.
More to explore
· en
Berlin Zoo Welcomes Four Grumpy Pallas's Cat Kittens
Sophie Bennett
· en
The Ginkgo Tree: History, Characteristics, and Autumn Splendor in Japan
Victoria Scott

· en
A Look at Some of the Littlest Vehicles from Around the Globe
Riley Brooks
· en
Indoor Plants: A Year-Round Source of Wellness
Olivia Bennett

· en
How to make coffee in a coffee maker
Dean Parker
· en
How Long Is a Tamandua’s Tongue?
Seren Blake